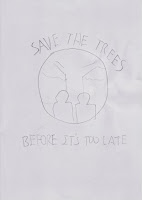
At the centre, I will make a big, shiny sphere. Inside of it, there is a big tree standing in the middle of the sphere. In front of the tree, I will draw two humans, but not in details. I want to draw them just like a 'symbol' looking beacuse I want the tree to be the main focus.
For the message, I will add the texts above and below of the sphere. The upper one will be 'Save the trees' while the below one will be 'Before It's Too Late'. About the background color, I will try to make a gradient color.
Now, the steps in the making of the poster:
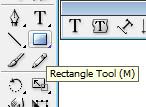
-First, I create one big rectangular until it fits to the border
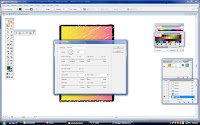
-Then, I applied 'Scribble' effect to it and adjusted the color, variation, and width. The result is turned like this:
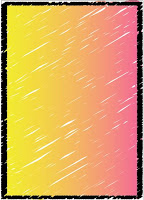
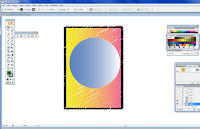
- Next, I used 'Eclipse tool' to create a big circle and applied the gradient color. This one, I want to make big and shiny sphere just like an earth).
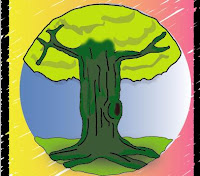
- Inside the sphere, I drew a big tree, just like in my previous work. It's a same technique by using 'Pen Tool' and 'Brush Tool' to draw a tree. For shadow effect on the tree, I created a random shape by using 'Brush Tool', make it black and adjusted its opacity to 50%. I also use 'Blur' effect on the tree to hide the tree trunk's excessive. For the ground, 'Rectangle Tool' is used and green color is applied. The excessive part of the ground has been adjusted with 'Warp Tool' to make it fit to the sphere.
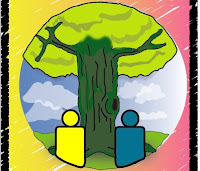
- Then, I created a bunch of clouds by using 'Brush Tool', applied the white colour and make them 59% of it opacity. For the humans, I used 'Eclipse tool' to create two heads and 'Rounded Rectangle Tool' for the body. I've adjusted the body with 'Warp Tool' so the parts are not excessive out from the sphere.
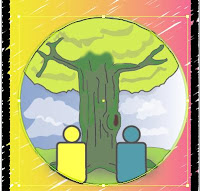
- To make the sphere look shiny, I created another circle and applied it with a white colour. I've adjusted its opacity to 39% so it looks transparent and then, placed it at the centre of the sphere.
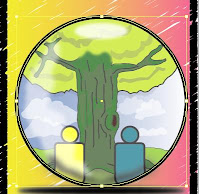
- To add more shiny and reflective effect on the sphere, I created a circle, but make it look flat and not in a circle shape anymore. Apply with a white color, adjust its opacity to 81% and for this one, I used 'Gaussian Blur' to make it more realistic for the light reflection. After that, I placed it at the top of the sphere where the light source is came from. Also, at the side of the sphere, I created a random ,white in color shape with 'Brush Tool' and adjusted the opacity to 58% to create a low light reflection effect at the side.
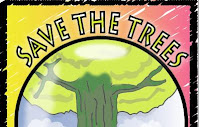
- Now for the text, I started with 'Save the Trees' first and I want to put it at the top of the sphere. At first, I want to make it normal and flat, but I've decided to make it in curve around the sphere. In order to do this, I choose the sphere (the one with a gradient effect) as a path for the text to make it look curvy. The font for the text is 'Lithos Pro' and the font size is 90pt. Adjusting the text is quite tricky because the text did not look centered enough. It's also hard to adjust the angle around the sphere, so I just make it slowly. After I've satisfied with the text position, the text has been convert to normal out line by selecting 'Type>Create Outline". That means, I can freely adjust and resize my text. After that, the text is applied with gradient color and the size of the stroke is 5pt.

- Next text is 'Before It's Too Late' and I want to put it below of the sphere. The text font is still same, only the color is different and the font size is 85pt. Like the first one, after creating the text, I created the outline for it. and the text is just laying flat at the bottom. Now, for this one, I want to apply the reflection effect of the text, so it will look lovely for the poster. To do this, I'd duplicated the text into two. One is still remain in the position, while another one will be a 'reflection' for the text. To do this, I choose 'Transform' and rotate the text into 180 degrees. I put it below the orignal text and then, I choose 'Transform' again and reflect it vertically. After that, I applied 'Gaussian Blur' effect to it. Now the text has a nice, reflection effect.
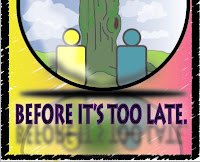
-Before I finished my work, I want to add more details on the poster. Since I've applied the reflection on the text below, I need to apply to the sphere and inside of the sphere too, so it will look more realistic. Like I did for the text, I used copy, reflect and rotate technique for the sphere. Since it's overfilled the border, I used 'Knife Tool' to cut out the sphere into a half and adjust it a little bit with 'Warp Tool'. All of it have been applied with 'Gaussian Blur' effect.
Now my poster has been finished!


No comments:
Post a Comment